
Third Submission for Altenew Educator Program
This is my submission for Clean and Simple Boutique Cards taught by the ever talented Jennifer Rzasa.

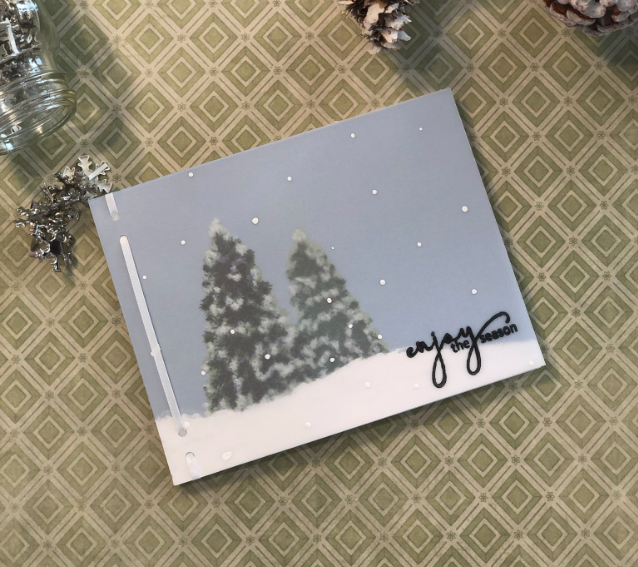
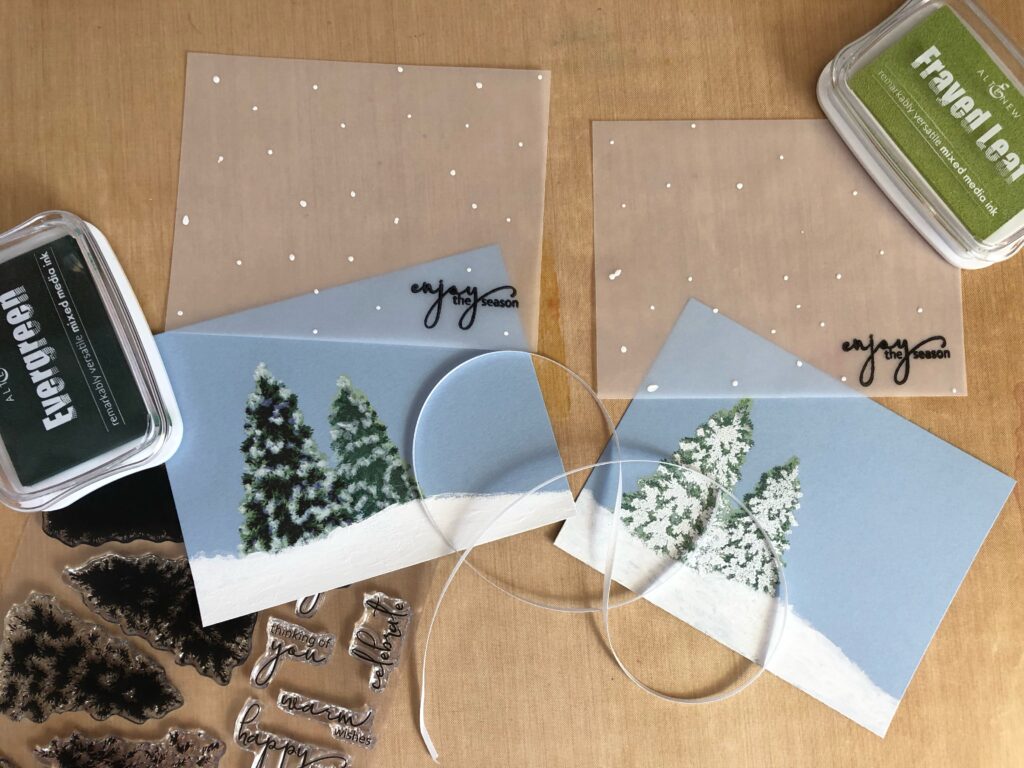
Since Christmas is right around the corner, (can you believe the year is almost over? I felt it just started!) I chose Altenew’s Plentiful Pine Layering Stamp Set. I thought the pine trees would make a peaceful snowy scene. I wanted to keep it simple, yet elegant, and felt that what I learned from this course would fit right in with that.
I stamped the pine trees in Altenew Frayed Leaf, Forest Glades, Evergreen, and Jet Black ink on Stampn’Up Seaside Spray card stock cut to 5 1/2” by 4 1/4“. The big tree was stamped in Crisp Dye Inks, while the small tree was stamped in Mixed Media Inks, to try to make it look softer and farther away. I used the large tree mask from the matching Stencil and Mask set when stamping the small tree so that it appeared behind the large one. I gave some drying time for the Mixed Media inks between layers so that I wouldn’t smudge it when stamping.
I wanted to try two different methods for the snow on the trees, one embossed and the other “sprinkled”. For one card I replaced the Jet Black ink used for the final layer of the pine trees with embossing ink. Then I heat-embossed with Simon Says Stamp Detail white embossing powder. This gave it a fuller and fluffier snowfall look that matched the snowy ground quite well. For the other card I simply used white Wink of Stella to go over the edges of the Jet Black ink, not covering it. This gave it a more gentle snowfall look, plus added in some sparkle. Being just on the edges of the final layer also gave the trees more depth since it didn’t cover up the Jet Black ink. I think both methods turned out rather lovely. I could not decide which one I liked the best!
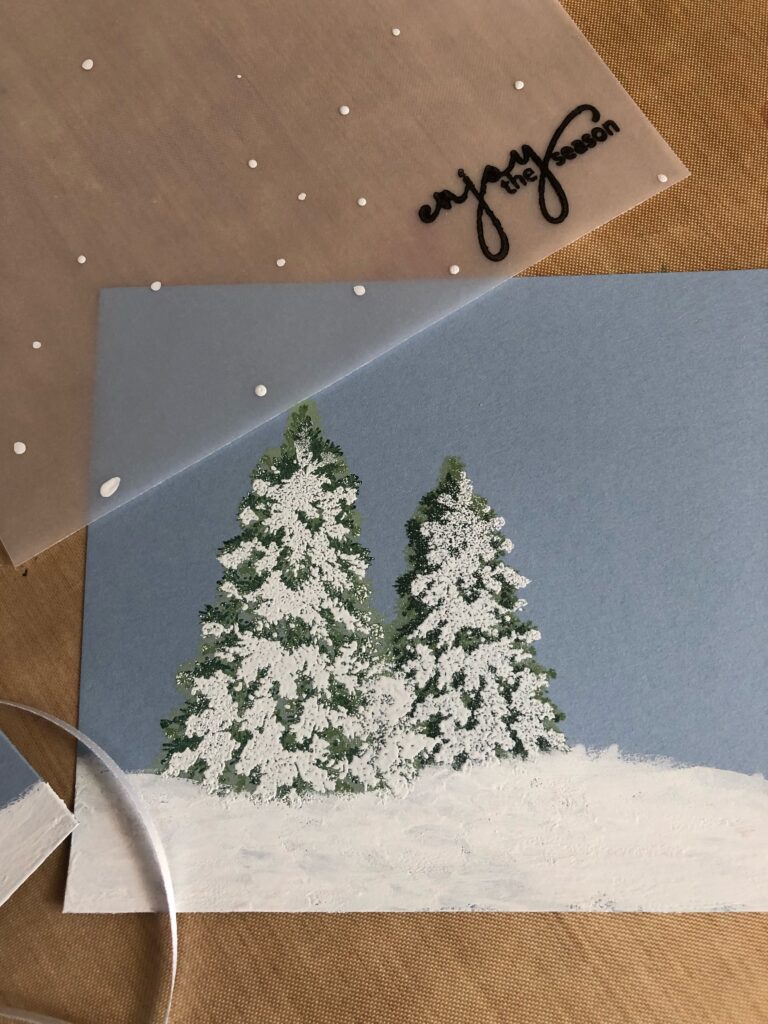
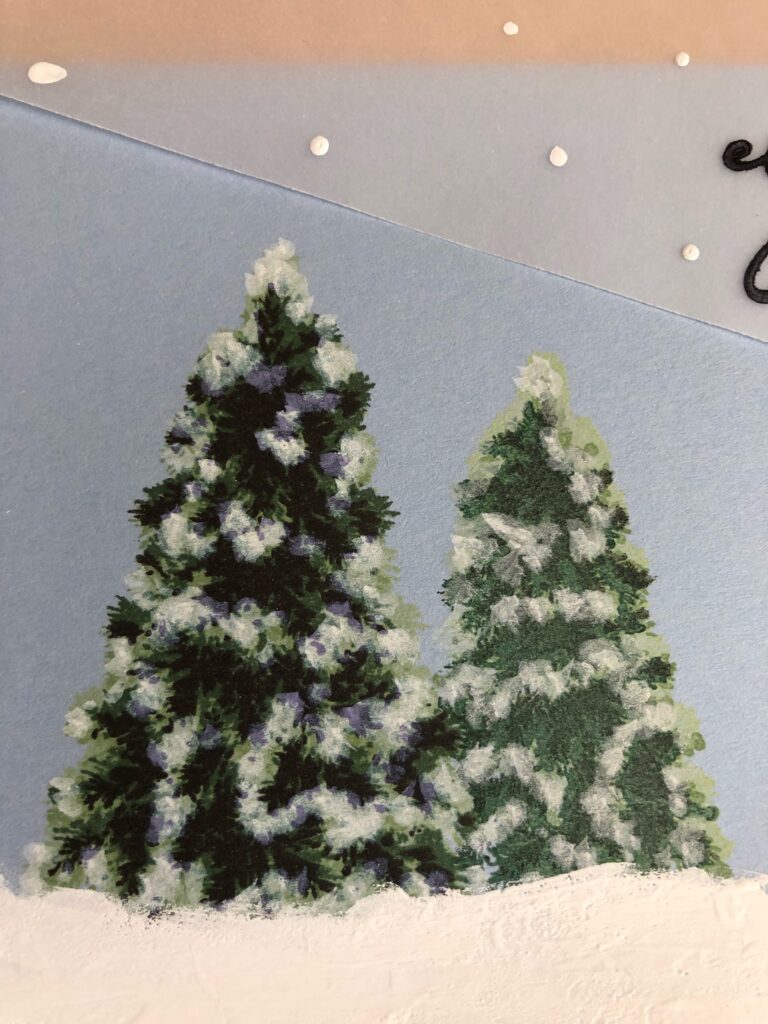
When the trees were complete I used Dr. Ph. Martin’s Bleed Proof White to paint the snowy hill on the bottom. Once it was dry, I brushed some white Wink of Stella over it. Gotta have some bling somewhere! 🙂
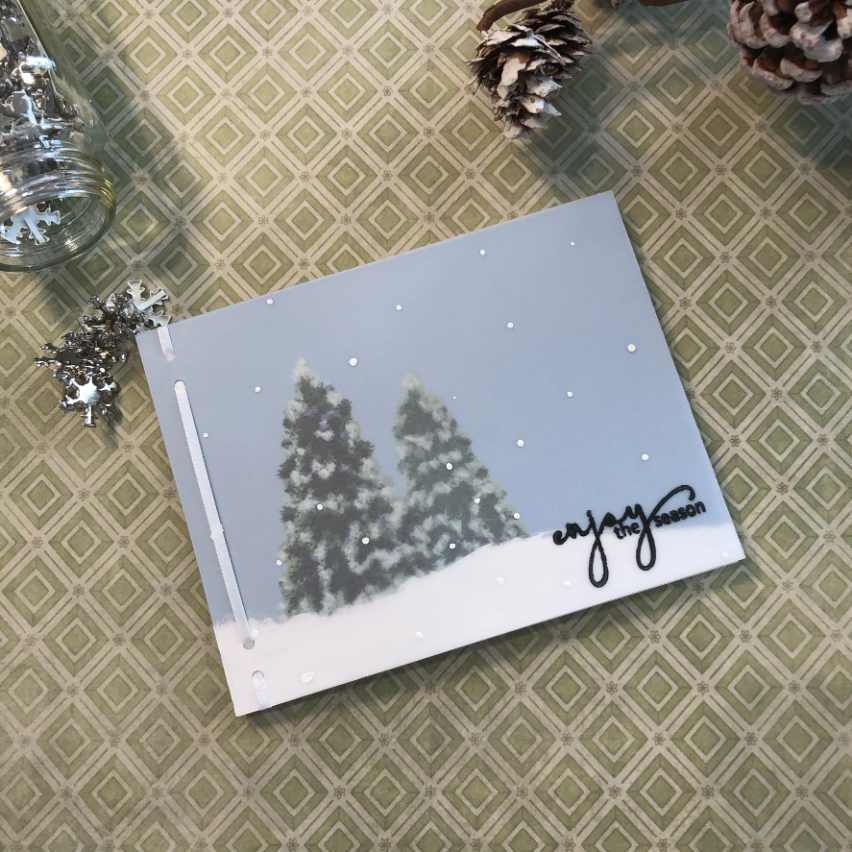
I trimmed a piece of vellum to 5 1/2” by 4 1/4 ” and in the lower left corner I stamped the “enjoy the season” saying from the Plentiful Pine set in Versafine Onyx Black ink, then set it aside to dry. I used Dr. Ph. Martin’s Bleed Proof White on the very tip of a small paintbrush to tap on the snowflakes.
On the back of the Seaside Spray card stock I measured and drew pencil lines so that I could punch the holes evenly for the ribbon. I held the vellum and card stock together and punched all the holes at the same time. This way I didn’t have to mark up the vellum but the holes aligned correctly. I used a 1/8" hole punch and a white 1/8" ribbon. It fit perfectly with no gaps showing.
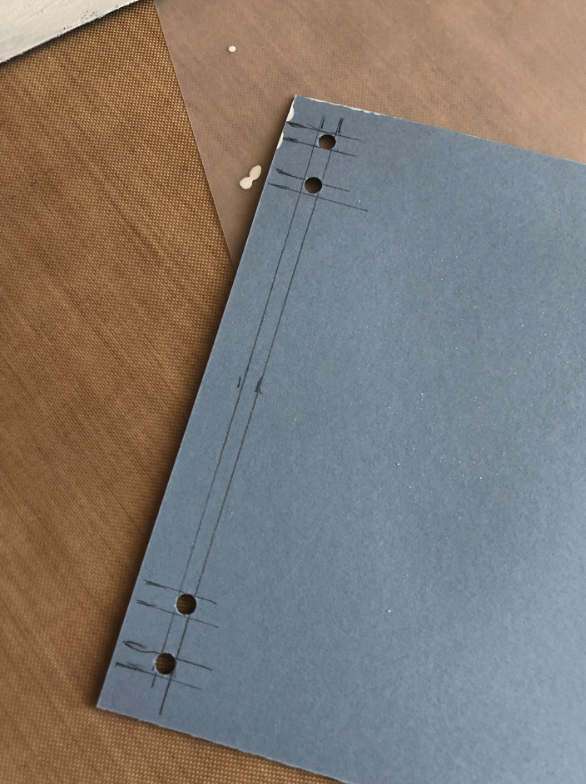
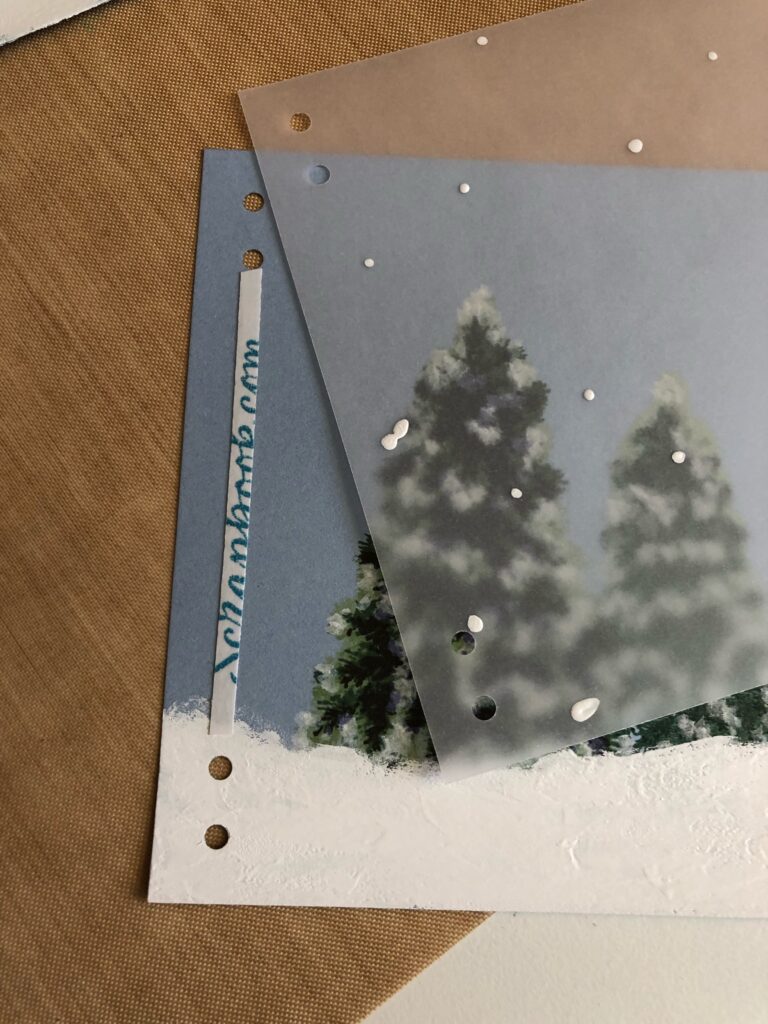
I put a 1/8" strip of double sided tape between the holes on the card stock to help hold the vellum in place, then I laced the ribbon through and secured the ends to the back of the card stock. The finished piece was adhered to a card base of the same size.
I really enjoyed this card, trying out the different techniques and seeing how they turned out. Sometimes my experiments turn out great and I can’t wait to show some one (“lookie what I did!”) and other times (okay more often than not!) I don’t want anyone to look at it! Truth be told, on the experiments that go bad I learn far more than when they go great. I guess I would never have the “greats” without the “bads”.
Thank you for stopping by and have a wonderful day!
Carol 🙂


Carol! What a gorgeous beauty!! This has me all heart eyes. So so so good! Well done!
Thank you for submitting your gorgeous work to the AECP assignment gallery.
Thank you so much Erum!
Love this card! Now I want this stamp set in my stash.
Thank you Jane! It is an amazing set!