
Second Submission for Altenew Educator Program
All About Layering 2
This is my submission for All About Layering 2 taught again by the wonderfully talented Nicole Picadura. She shows such wonderful techniques for working with Altenew’s layering stamp sets.
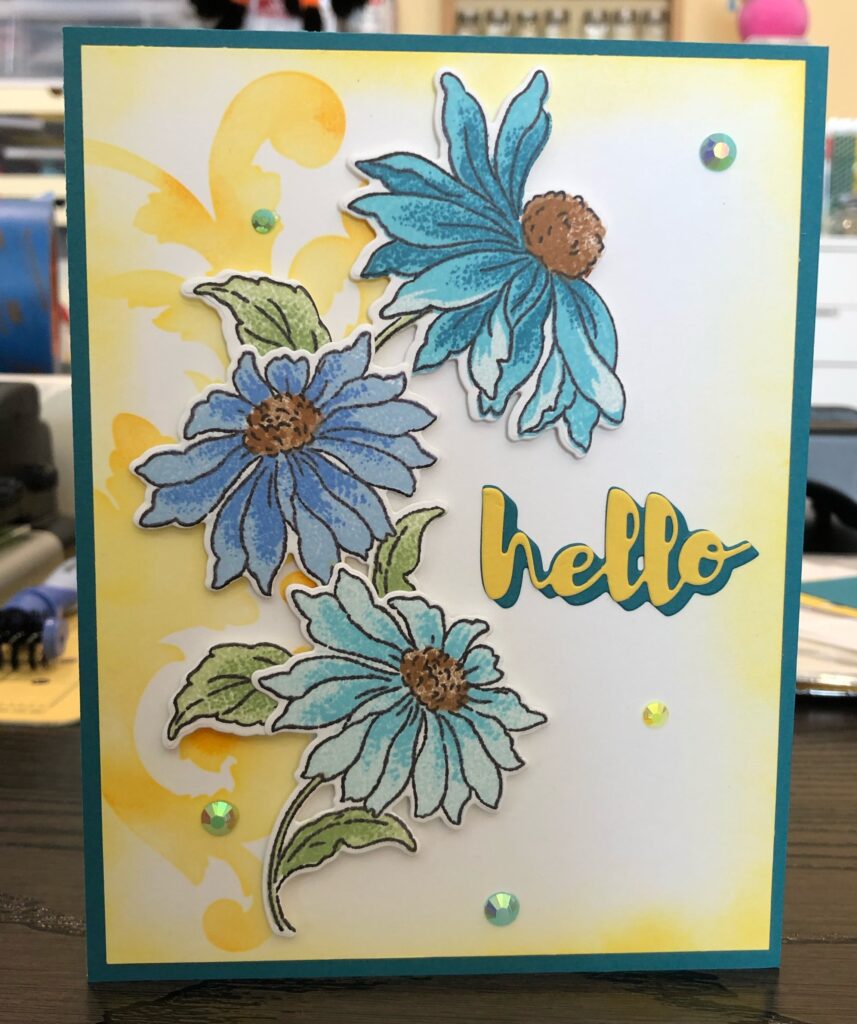

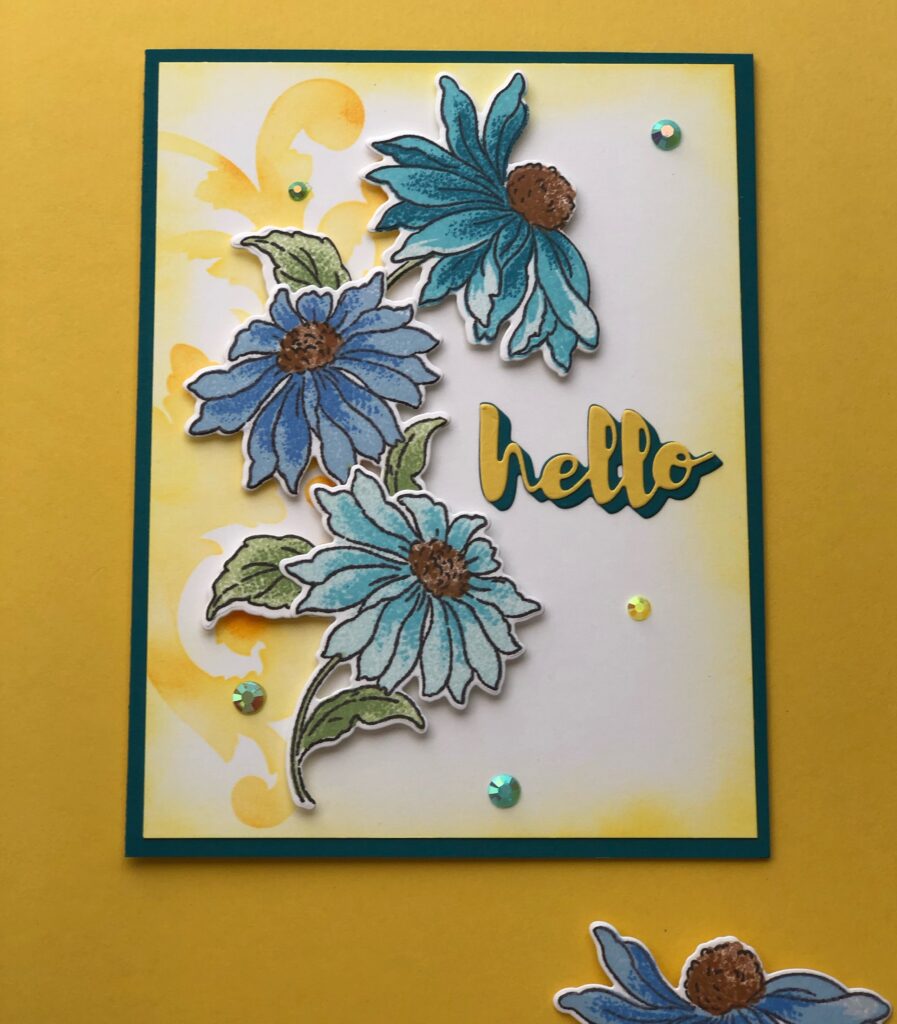
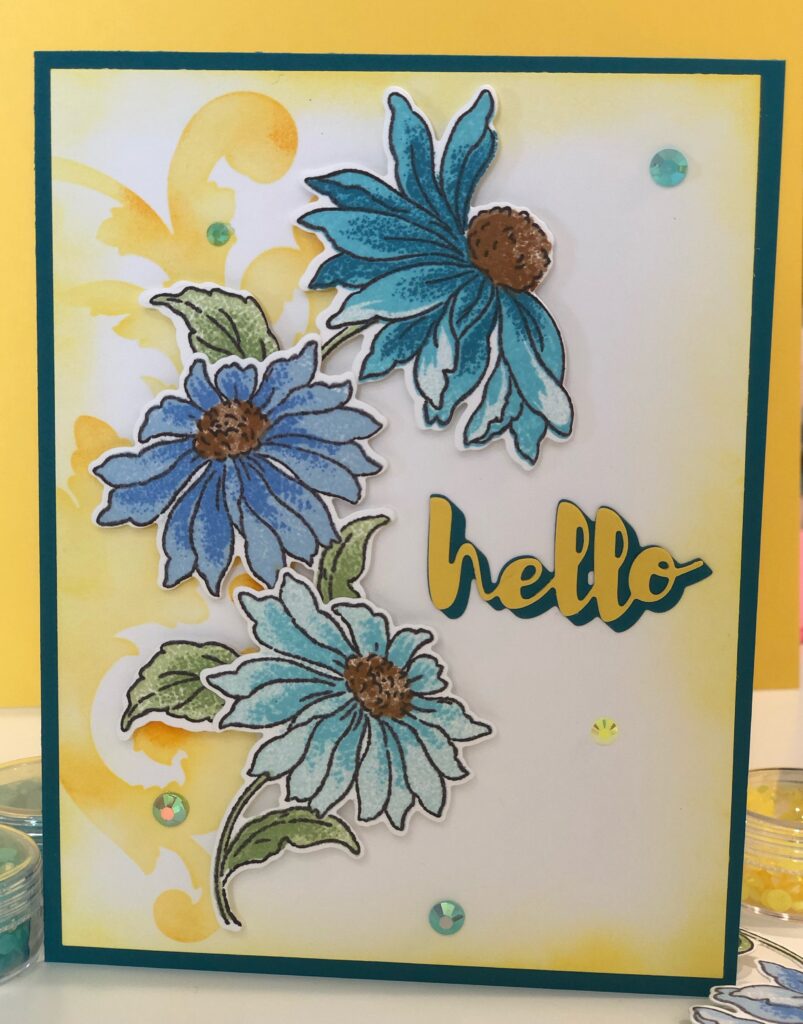
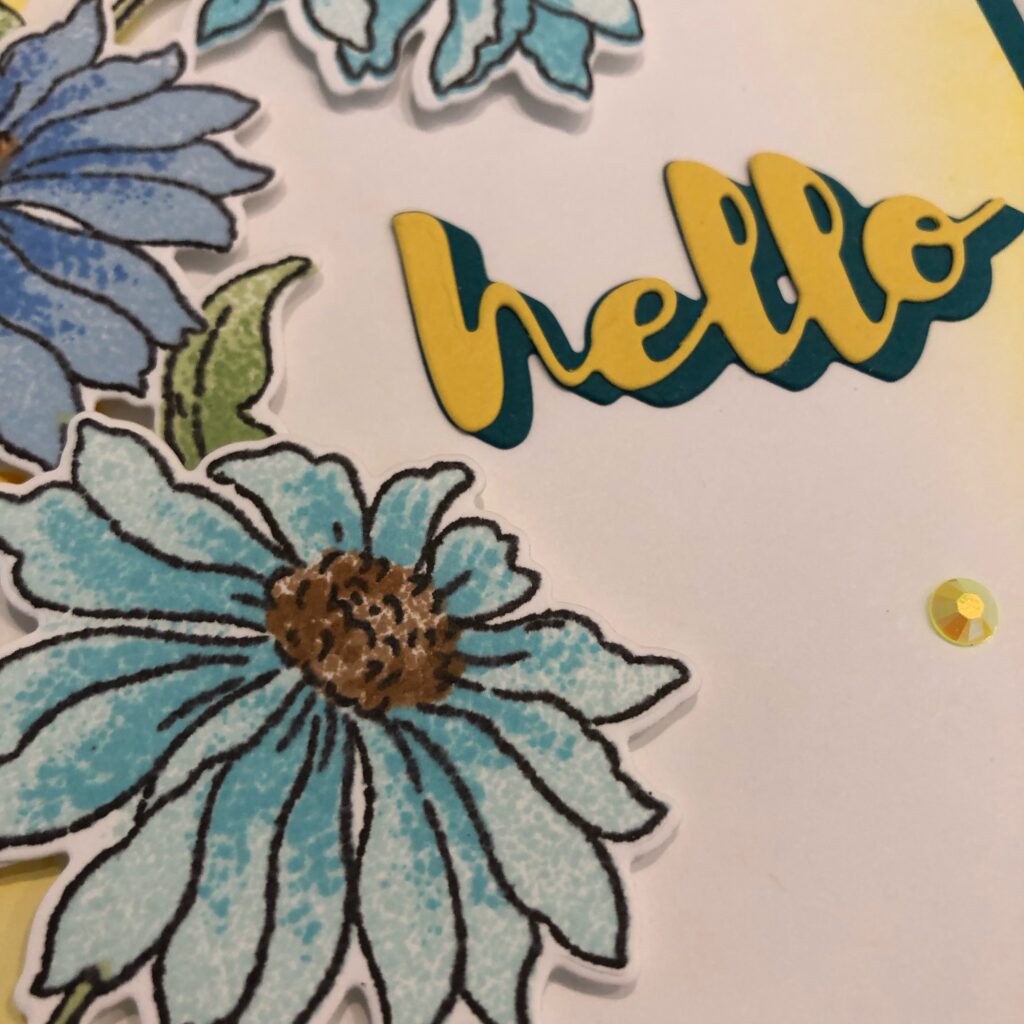
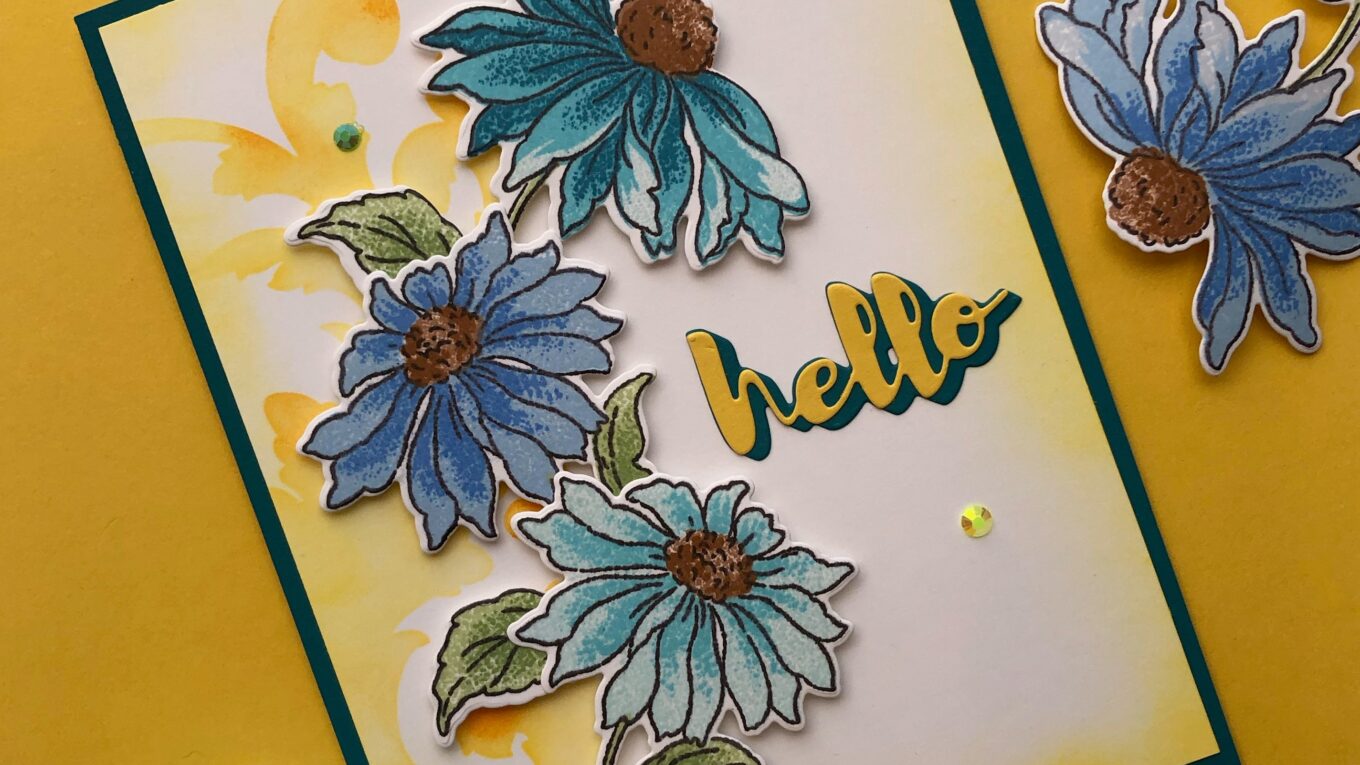
For this card I used Altenew’s Build-A-Flower Coneflower stamp set. I also used the Baroque Motifs Mask Stencil set and the saying is from Altenew’s Craft-A-Flower California Giants set. I have always loved coneflowers. I think that the large dark center with all the delicate pale petals falling away from it are a wonderful contrast and just a joy to behold. I tried to arrange the flowers on the card so that they mimic the falling away the petals do.
I stamped the outline image of the large and small coneflowers with Altenew’s Crisp dye ink in Jet Black onto Neenah Classic Crest Cover 110lb Solar White card stock twice each. For the teal colored flowers I stamped the subsequent layers in Sea Glass, Ocean Waves and Dusk, with the smaller flower only using the first two colors. For the blue flower I used Crisp dye inks in Caribbean Sky and Persian Blue. The center of the flower is stamped in Mocha and Espresso while the leaves use Frayed Leaf and Forest Glades Crisp Dye Inks. I did a small and large flower in each color set so that I had extras to see which colors I liked best in my final card layout. All of the finished images were then die cut using the Coneflower dies.
I trimmed a piece of the Neenah card stock to 4 3/4” by 6 1/4“. I lined up one of the larger images from Altenew’s Baroque Motifs Stencil on the left edge and blended in some Warm Sunshine Crisp Dye Ink with a blending brush. Without moving the stencil, I added in some darker areas with Snapdragon Crisp Dye Ink. I started laying out my flowers and noticed how drab the right hand side of the card looked, so I blended more Warm Sunshine ink around the edges. That seemed to really brighten the whole card up.
I played with layering my flowers on until I found the arrangement that looked the best to me. It helped to stand away from my craft table and look at it from afar, gave a different perspective. I wanted them to look like they were falling along the edge of the card. I used some Lawn Fawn glue to adhere the flowers together, not on the card but just to each other. I trimmed a large leaf from one of my extra flowers to put behind the small teal flower on the bottom — my eye thought it needed it! 🙂 I set the flowers aside to dry.
For the saying I used Stampin’Up card stock in Daffodil Delight and Brutus Monroe card stock in Sea Urchin. I used the “hello” from California Giants Craft-A-Flower set. I glued the pieces together and set them aside to dry.
My stenciled card stock was taped to a 5″ by 6 1/2” mat from Brutus Monroe Sea Urchin card stock. This was taped to a white card base of the same size.
I added foam dots to the back of my flowers and stuck them to my stenciled card stock then glued the saying to the right side in the middle.
Then I sat staring at my creation… it needed something… BLING! I grabbed my Pinkfresh Studios Jewels and put a bunch of them all over the card. I told myself to calm down! I removed most of them…thankfully I always wait to glue them down until I’m sure that I have edited myself otherwise the whole card would just be bling. Is that so wrong? 🙂 So, after much editing I decided on just 5 jewels in Sky Blue, Ocean Breeze and Sunshine.
I had a great time with this project. I enjoy bringing in many different techniques with my cards like die cutting, stamping, stenciling and blinging… so much blinging!!
Have a wonderful day and thank you for visiting me!
Carol 🙂


Carol this looks absolutely wonderful!! I love the colours. Just a tip, when editing, don’t crop your photos too close to the project, leave a bit of room around it for the eyes to settle like the second photo where you have added gems and a flower at the opposite end. Read the photography guidelines or the step-by-step assignment submission guidelines, I believe it will be very helpful to you. You will find the link to these on the main AECP course landing page.
Thank you for your gorgeous submission!
Thank you so much Erum! I really had fun making this card. I will go over the guidelines and keep your tip in my mind when photographing my cards. Have a beautiful day!
Carol