
Altenew Educator Program First Submission
This is my class one submission for the Altenew Educator Program. The class is “All About Layering 1” taught by Nicole Picadura. This is a great class for starting out with Altenew’s wonderful layering stamp sets.
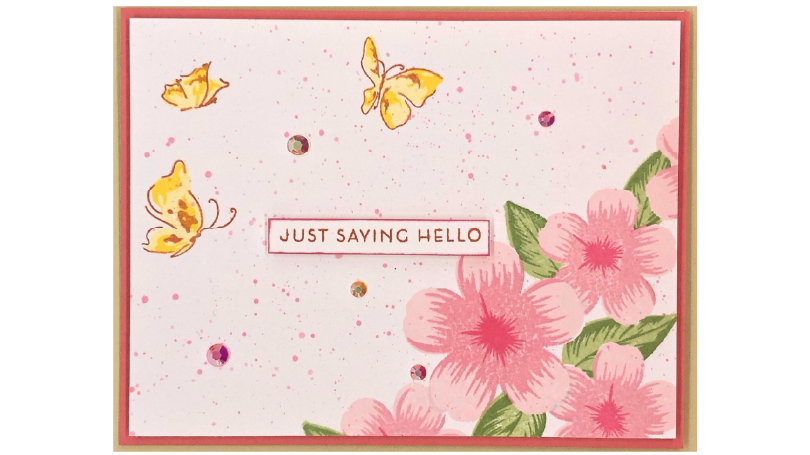
For this card I used Altenew’s Sakura Blossoms and Painted Butterflies stamp sets as well as Altenew’s Crisp Dye Inks. I bought the Sakura Blossoms because I really love the flowers, they remind me of cherry blossoms…but bigger! I was a little intimidated to use them as they had no outline to go by, but this class has shown me..no outline…no problem! And the butterflies, well, BUTTERFLIES! 🙂
For the image I used Neenah Classic Crest Cover 110lb in Solar White trimmed to 4 3/4” by 6 1/4“. I stamped the large sakura blossom in Frosty Pink, Cotton Candy and Coral Berry. I made a mask of the large sakura blossom and placed it on the blossom so that I could stamp the small sakura blossoms around the large one, giving the impression that they were behind it. The small blossoms are in the same colors as the large one.
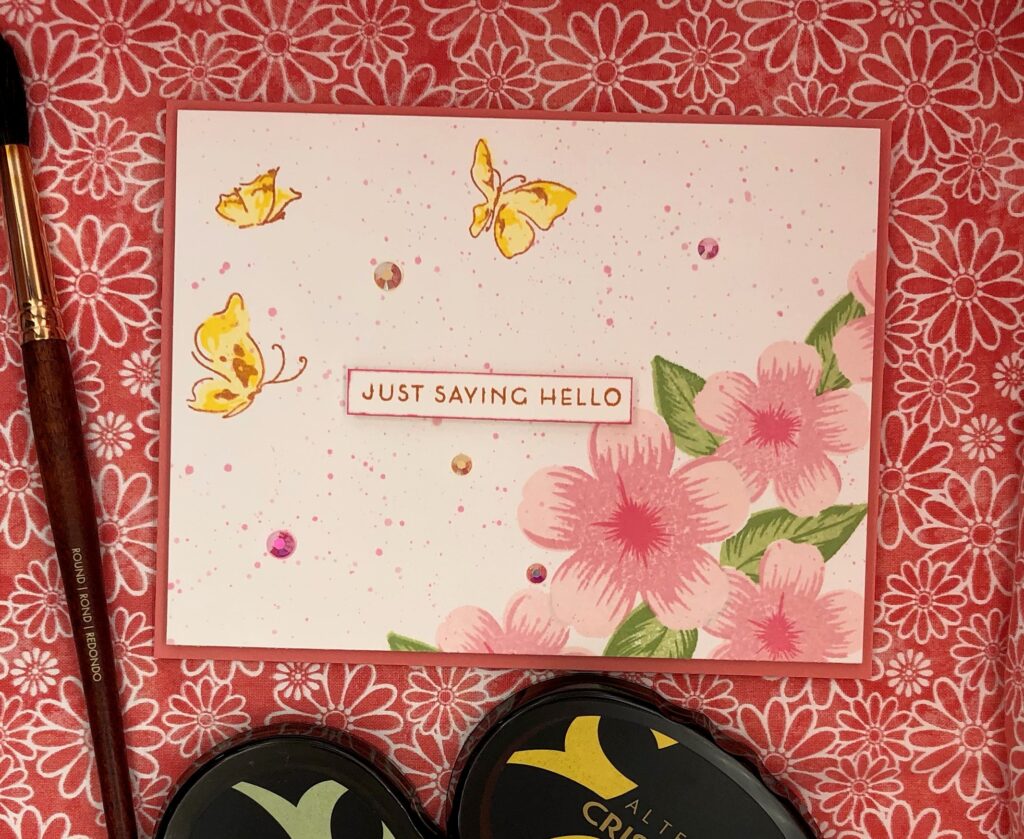
To help align the subsequent stamp layers when images go off the edge of my card, such as the small blossoms and leaves in this card, I use a thin piece of printer paper under my card when stamping, I can then line the images from the card and printer paper up, so that I can see the whole image rather than just the edge.
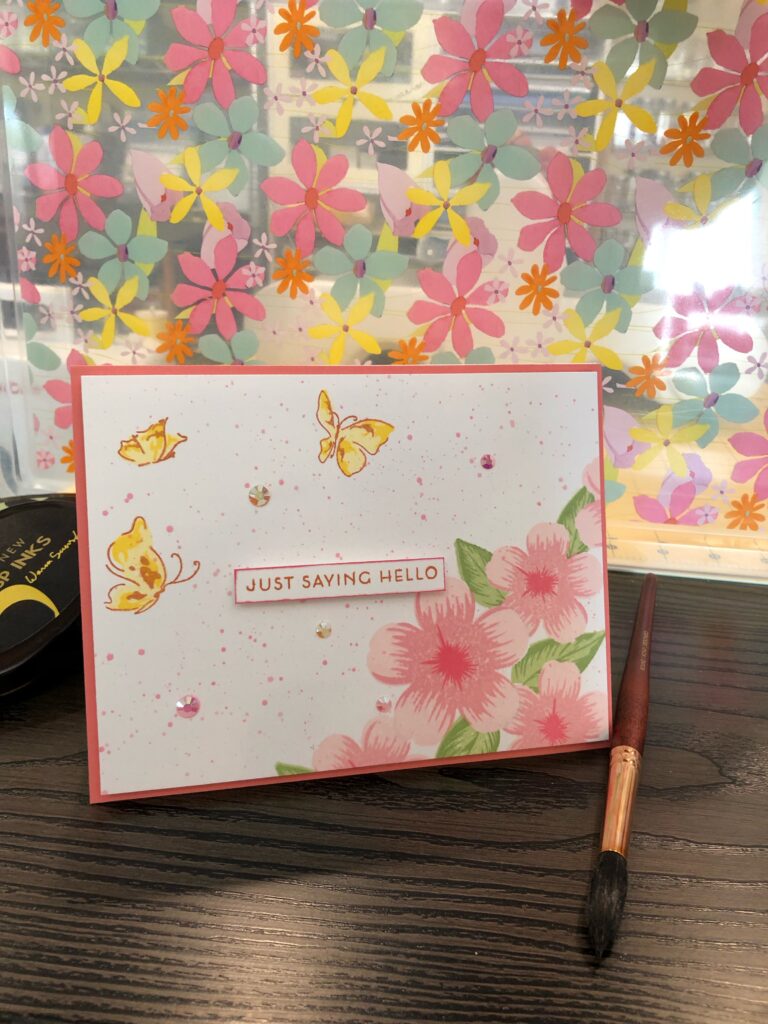
I made two masks of the smaller sakura blossom and used them along with the larger mask to place leaves behind the flowers, moving the small masks as needed. I used the small and large leaves from the Sakura Blossom set, stamped in Frayed Leaf and Forest Glades.
I noticed that the small flowers seemed to meld into the large one, given that they were all the same color, so I decided to give the flowers some depth or shadow. I used a light cool gray colored pencil to gently color the small blossom edges, making them look more like they were under the larger blossom.
Next I used Painted Butterflies to add some much needed character in the upper left part of the card. I choose three medium to small butterflies and stamped them in Paper Bag, Buttercream and Warm Sunshine.
For the splatters I gently smooshed some ink from Cotton Candy and Coral Berry ink pads onto my silicone mat. I added a small spritz of water to thin the ink and make it “flickable”. I kept the two colors separate at first and flicked each on to my card with a small round paintbrush, then mixed the two colors and flicked some of that on the card…because why not?
I stamped “Just Saying Hello” from the Painted Butterflies set in Paper Bag onto scraps from my image base. I trimmed it close to the saying, then gently dragged the edges across the Coral Berry ink pad to make it pop. I attached it the card using foam tape.
I glued a few Pinkfresh Jewels in Ballet Slipper, Bubblegum and Peach Fuzz on the card to give it some shiny bling. I love bling!
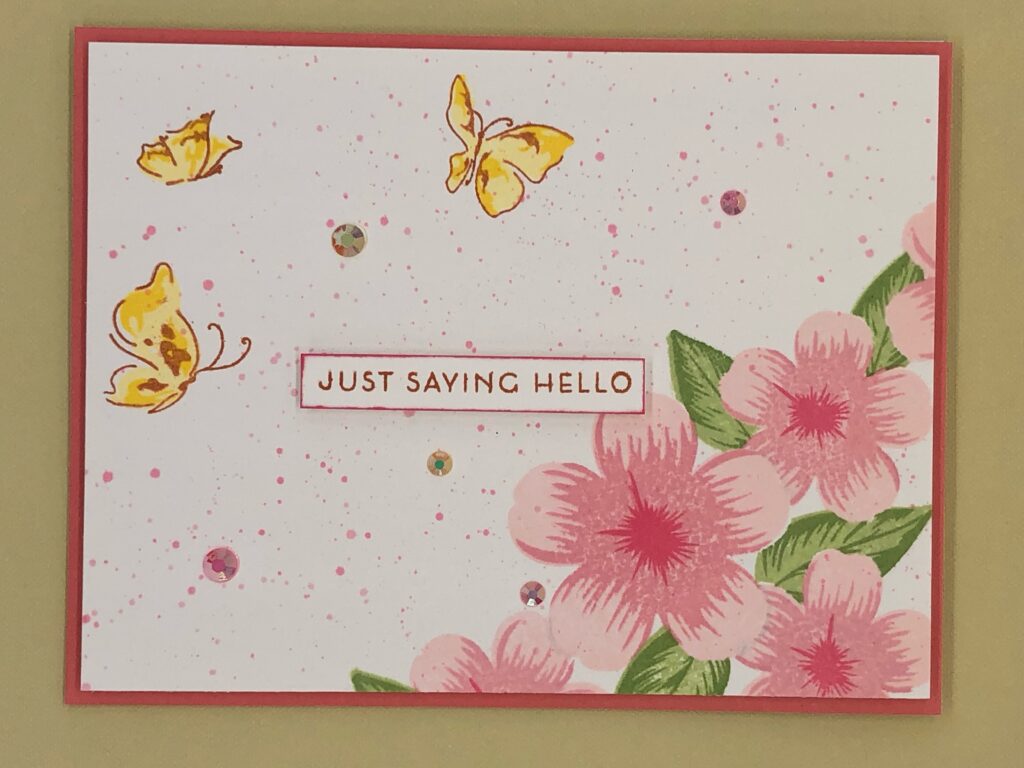
The image was attached to Stampin’Up Flirty Flamingo card stock trimmed to 5″ by 6 1/2” with foam tape for a nice coordinating mat and a pop. Then it was attached to a white card base of the same size as the mat with double sided tape.
This card was a joy to make. The class was fun and I learned so much, especially just the simple act of practicing with your stamp sets. Thank you Nicole!


aww this is so pretty, Carol!! Lovely colours too! Thank you for submitting your work to the AECP assignment gallery.
Thank you Erum!